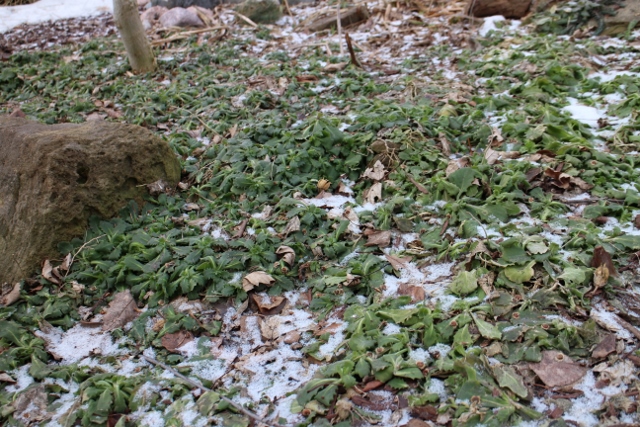
By Carol Cichorski, on March 27th, 2014 Finally! My winter aconite is blooming. I took this picture on March 25th, which is pretty much a month behind schedule. It’s a small victory for the coming of spring. At this point, I’ll take ‘small’ as long as the word ‘spring’ is somehow associated. We’ve had warm winters where I’ve taken pictures of it for February 15th’s Garden Blogger’s Bloom Day. THIS wasn’t one of those years.

 THIS was one of those years where we keep getting more snow and cold and snow and cold and snow and cold. It just continues to hang around, like my cup did the very next morning as I took this picture. Really, haven’t we had enough already? THIS was one of those years where we keep getting more snow and cold and snow and cold and snow and cold. It just continues to hang around, like my cup did the very next morning as I took this picture. Really, haven’t we had enough already?
I have to agree with the writer of the Plum Grove Garden Club’s newsletter when she borrowed this quote from Rottenecards:
“Dear Mother Nature,
Get back on your meds, open a bottle of wine, and start thinking, warm, happy thoughts.”
The newsletter also quoted Helen Hayes:
“All through the long winter, I dream of my garden. On the first day of spring, I dig my fingers deep into the soft earth. I can feel it’s energy, and my spirits soar.”
Helen apparently wasn’t writing from Chicago when spring came this year. If she was, she would have written this:
“All through the long winter, I dream of my garden. On this first day of spring, I dug my fingers deep into the frozen earth. I can tell they are broken, they feel so sore.”
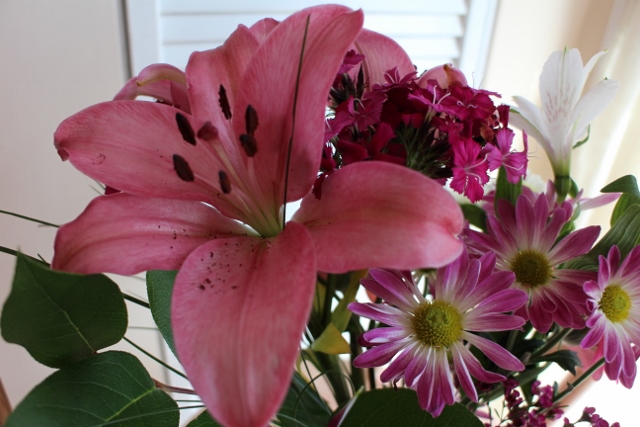
The Plum Grove Garden Club did more than wax poetically about spring, they brought the ‘small’ to fruition and the ‘spring’ to their member’s homes. And to mine, as Sue had invited me as a guest.
Their Plum Krina offered a workshop on miniature floral arrangements, in anticipation of the Garden Club of Illinois Flower Show on April 27th & 28th. They are serious about small, with 5 inch and 8 inch arrangements being the expectation.
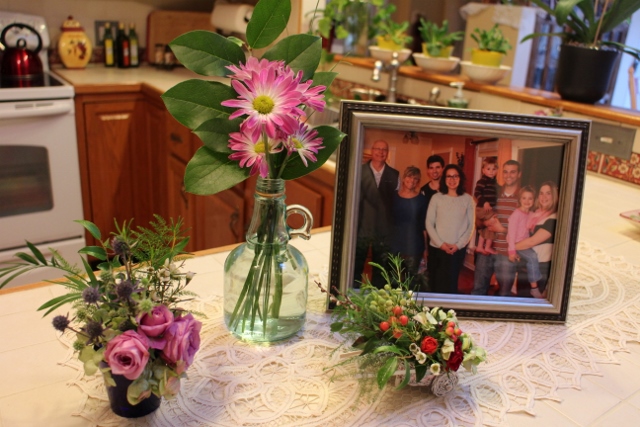
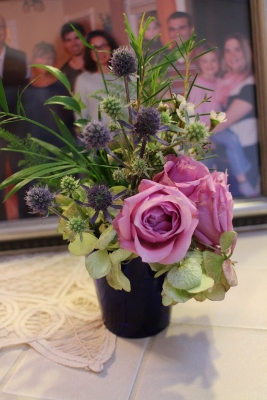
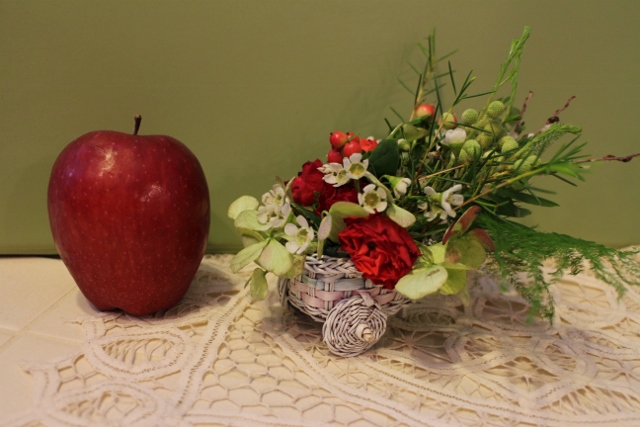
My arrangements have been gracing the kitchen countertop for the last few days, hopefully giving Mother Nature a hint that its time to give us more. And I aint taking snow for an answer!
By Carol Cichorski, on March 16th, 2014 Mike and I are different. No, not just the obvious differences. Take the cherries below for example.

Well, you can’t actually take them because we had them with our pancakes yesterday morning. Let’s use ‘take’ a little less literally. We bring home a 10 pound bucket of frozen cherries from Door County every autumn. Last year’s stash is just about gone. Don’t tell Mike. (Now he knows.) (That sneak, he read this when I wasn’t looking.) I’m Ok with running out of cherries, because the anticipation of next year’s cherries is so enjoyable for me. Mike, on the other hand, would prefer that we buy the industrial size. The constant reality of readily available cherries for his pancakes would be enjoyable for him.
When it comes to gardening, warm climates are kind of like Mike’s preference for cherries whenever he wants them. Warmth and flowers and pretty all the time. But why would you not want this as constant reality?

Ok, maybe not the best picture for my point. I call that picture ‘Snow Is a Mountain’, as opposed to today’s picture of ‘Snow on the Mountain’.
In my mind, I’m enjoying the anticipation of May’s Snow on the Mountain.

We do manage to enjoy flowers year-round in Chicagoland. It’s like if Mike knew I was having a bad day last week when he came home with flowers and jewelry. What a guy!
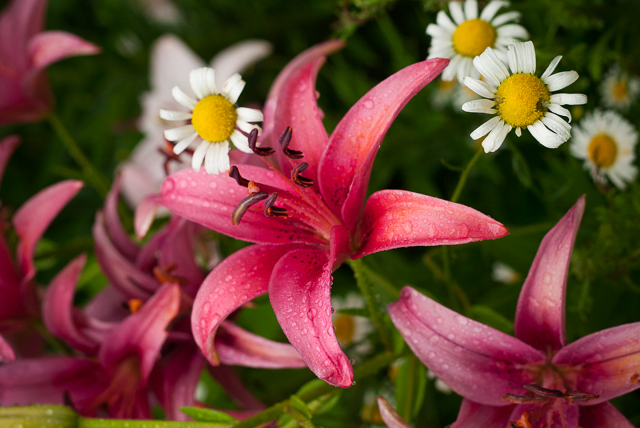
In my mind, I’m reminded of last year’s Asiatic lilies in our garden. There it is again, anticipation.
We are both enjoying the anticipation right now, all the signs of spring. The birds were singing loud enough yesterday that we opened the kitchen window a bit to listen, despite the cold. I saw a father and son at Busse Woods in shorts. We do that in Chicago when the temperature is barely above freezing. And now as we drive past Busse, the car window is rolled down just enough to listen for the sound of peeper frogs. Soon. Soon.
The Chicago Flower & Garden Show opened yesterday. Sue went yesterday and said the show was the best it’s been in years. Even if she had to leave after just seeing the entrance, it would have been worth it. Fortunately, she didn’t leave, and was filled with anticipation. I look forward to speaking there tomorrow. I did think of changing my topic name from ‘Winter Interest’ to ‘Winter NOT Interested‘, but I won’t. Join me at 12:30 as I continue my anticipation, or as others might call it, my delusion.
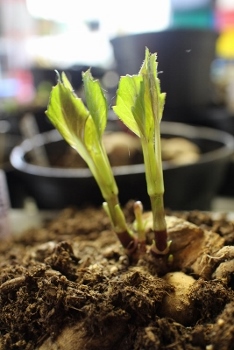
By Carol Cichorski, on March 3rd, 2014 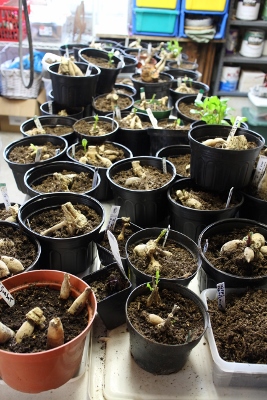 Mike is up to something. He disappears into the basement for hours at a time. He does that regularly this time of year. He becomes the mad scientist in his laboratory, planning to emerge victorious in May as his 52 pots of dahlias are transformed into 350 dahlia plants. Last year he probably grew 700 plants. I missed him. So though the 700 was my idea, I’ve gotten a little more realistic this year. As always, we’ll keep about 100 for our garden. The rest will go to dahlia sales for the Central States Dahlia Society and the Elk Grove Garden Club. Mike is up to something. He disappears into the basement for hours at a time. He does that regularly this time of year. He becomes the mad scientist in his laboratory, planning to emerge victorious in May as his 52 pots of dahlias are transformed into 350 dahlia plants. Last year he probably grew 700 plants. I missed him. So though the 700 was my idea, I’ve gotten a little more realistic this year. As always, we’ll keep about 100 for our garden. The rest will go to dahlia sales for the Central States Dahlia Society and the Elk Grove Garden Club.
You may not be looking for 100 dahlias in your yard, like us, but if you’d like more blooms sooner (and who doesn’t?) it’s just about time for you to get started. ‘Starting’ for you would be to first get your hands on a dahlia tuber. Order on-line, go to your local nursery, or even Costco or Home Depot. If Kelvin Floodlight is available, get it.
Don’t wait till there is no more frost so you can plant it outside. Start the tuber inside about 6 weeks before the last frost. A regular fluorescent bulb will provide enough light. A sunny window will probably provide enough light, but the warmth of the sun will dry out the pot quicker than needed, meaning you have to water the pots more often. Fluorescent lights provide good light, but in a cool manner so the pots stay cool and moist longer.
Although dahlias are well known for being fall bloomers, starting early like this will get you blooms from August through frost. You’ll be planting a 1 foot tall plant outside on May 15th, rather than burying a tuber in the ground and not seeing anything above the ground until sometime in June. Clever, huh?
If you’d prefer, you can turn that one tuber into more plants. Basically, you’ll cut the sprouts off to make individual plants and root them. That process would need to begin now, so that there is time for 1 or 2 generations of sprouts to come up.
Here’s how to make more plants:
Step 1 – Plant the tuber. Nothing fancy here. You don’t even need light yet. Just a basic pot with basic potting soil and a tuber. As you can see in the picture above, it’s not even fully buried. This allows you good access to sprouts as they emerge.
Step 2 – Keep the soil moist, not wet. Just normal plant care. Sit back and wait. You’ll see sprouts in three weeks or so.
Step 3 – The sprouts will need light. Basically, green things need light, tubers and bulbs don’t until you see some sprouts coming out of them. Use fluorescent lights that are about 3 feet above the sprouts.
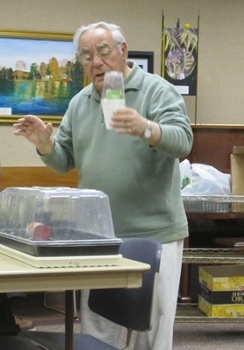
Step 4 – When a sprout is about 3″ tall, cut it off about 1/8 inch above the tuber. Don’t worry if you only see one sprout coming out of the tuber. When you cut that one sprout, you’ll typically see anywhere from 3-5 sprouts rise up from that very spot that you took the cutting from. Make a mini terrarium like Frank did below using a Styrofoam cup. Plant the sprout in about 2 inches of plain old pre-soaked kitty litter. Use non-scented, non-clumping, with about 1/8 inch of water in the bottom of the cup. The process even comes with a bonus – You get to go to McDonalds for an ice cream sundae so you have the plastic top for your terrarium cover. You can also use a clear plastic cup as Frank does in the photo, but its not as much fun.
Step 5 – In about 3 weeks, the sprout should have rooted. Carefully extract the cutting from the kitty litter, using a plastic fork to support the root area as you lift. Watch for the roots and be gentle with them. Its ready to transplant into a 4″ pot with dampened (soilless) potting mix in it. Mike allows his freshly potted cuttings to rest for 24 hours before putting them up near the lights again. They have been through a lot having been shuffled around. Let them catch their breath. They’ll thank you for it.
Step 6 – Take care of it like any other baby plant. It does need lots of light, so bring that fluorescent light within inches of the top. Keep the soil moist and perhaps water it with a very very diluted Miracle Grow solution, barely blue in color.
Step 7 – Plan on planting it outside after May 15th, but for now, keep it indoors. More on that later.
Why do you want to do all of this? Because you’ll get these!

Join me at the Chicago Flower and Garden Show on March 17th, 12:30. I’ll be speaking on Winter Interest.
By Carol Cichorski, on February 15th, 2014 It’s a cold winter Chicago day and I’ve got zinnias, black-eyed Susans and lettuce. I do. I really do. Here they are, just tiny seeds for now, but that’s about the best I’ve got at home with this year’s ice and snow and cold.
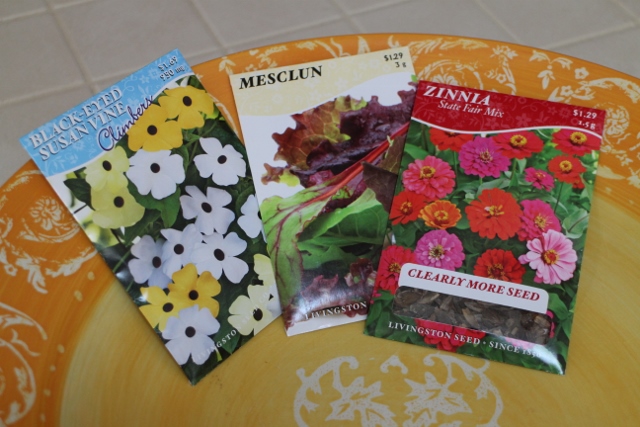
 I’m especially happy to have the zinnia seeds. In May, flats of State Fair zinnias are hard to come by around here, and I need 2 – 3 trays of them. This year, my personal shopper Lucille, took care of me. She made sure Bertholds ordered the seeds. Mike will start them for me and I’ll be ready to go. I’m especially happy to have the zinnia seeds. In May, flats of State Fair zinnias are hard to come by around here, and I need 2 – 3 trays of them. This year, my personal shopper Lucille, took care of me. She made sure Bertholds ordered the seeds. Mike will start them for me and I’ll be ready to go.
You might already know that 82 Zinnias Is Enough For Me. Take a look at the post and you’ll know why.
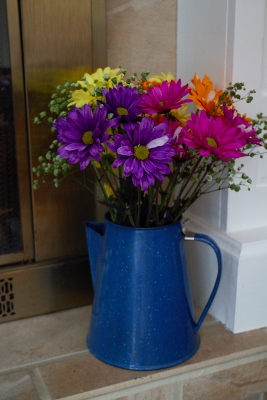
For some real blooms, I can look by my fireplace. I certainly can’t claim to have grown them. Well, I could, but it wouldn’t be true.
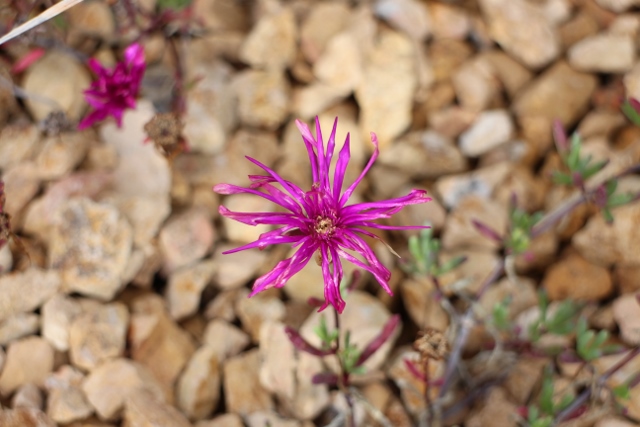
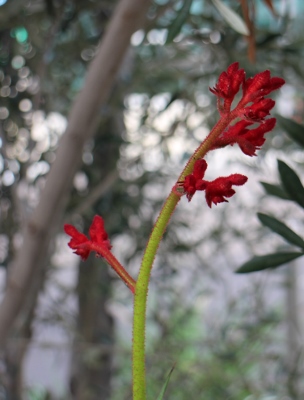
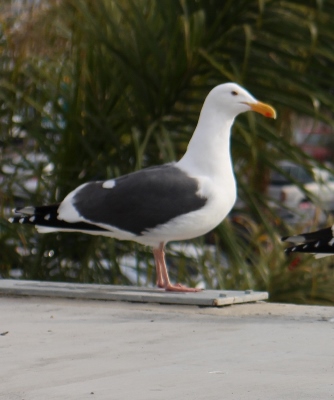
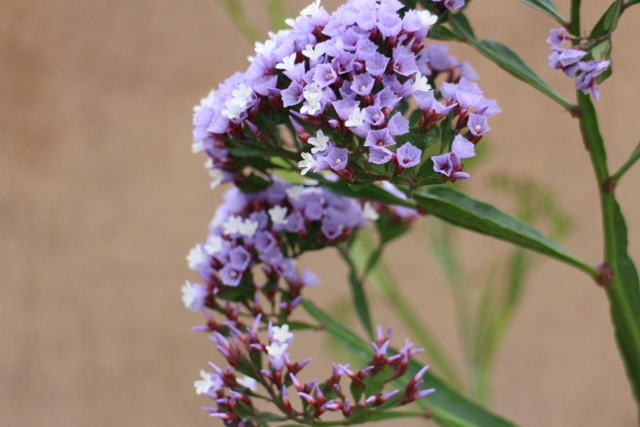
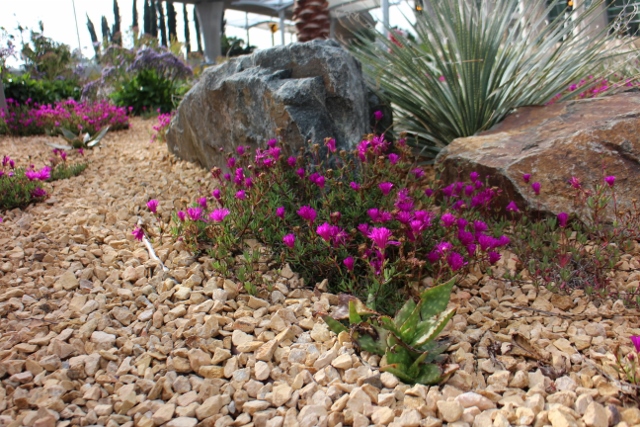
Still want more? How about this? I can claim to have taken these pictures a few days ago and that would be true. No, that’s not anywhere close to home. It’s the San Diego Airport. After all, it is Garden Bloggers’ Bloom day and I have a responsibility to bring you blooms.


Do you want to know what else is blooming in the February garden? To see what other bloggers have blooming on the 15th of every month, visit May Dreams Gardens – Bloom Day for our Garden Bloggers’ Bloom day entries.
Join me at the Chicago Flower and Garden Show on March 17th, 12:30. I’ll be speaking on Winter Interest.
By Carol Cichorski, on February 3rd, 2014 I’m so tired of calorie filled treats! I’m not tired of the treats, I’m just tired of the calories. It was my turn to bring snacks to church and I went for healthier. This one was so good and so easy that I had to share it. The magic is in the Won Tons. I never thought I would say that, but it’s true. The magic, the secret I am sharing, is … Won Tons.


1 package Won Tons (about 48, freeze the ones you don’t want now)
Greek yogurt (plain or vanilla, you decide)
A combo of fruit and nuts that makes you happy
– Blueberries, strawberries, kiwi
– Pecans or walnuts
– An optional but special surprise – a dollop of raspberry or apricot preserves
1. Place individual won tons in a muffin tin, with or without paper muffin cups
2. Bake at 350 for 5-7 minutes, just enough to brown the tops
3. The optional dollop of preserves goes in first
4. Yogurt next
5. Top with your favorite fruit and nuts
I’m thinking of trying this next with Granny Smith apples and walnuts mixed in with the yogurt.
Join me at the Chicago Flower and Garden Show on March 17th, 12:30. I’ll be speaking on Winter Interest.
By Carol Cichorski, on January 21st, 2014 Food – Water – Shelter. Those 3 words should be enough for an article on attracting birds for the winter. Just 3 words: Food – Water – Shelter. There, I’m done. Well, not exactly.
Those 3 words (Food – Water – Shelter) were not new information for me, and those 3 words (Food – Water – Shelter) may not be new information for you. Still I had to see Bob and Michele George’s yard before it hit home. So you get to see their yard too.
This furry and feather filled area was 3 feet away from their patio doors, and busy the whole time I visited.
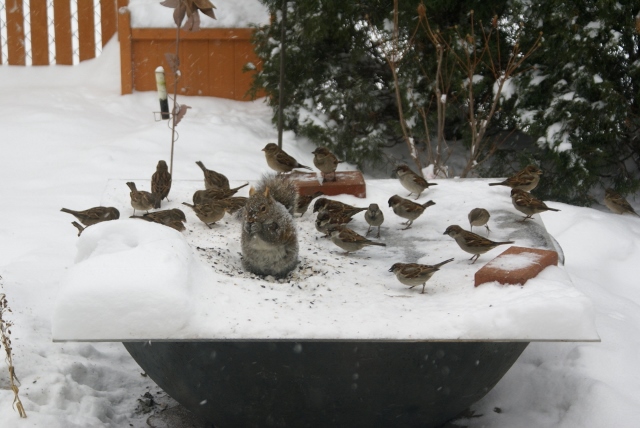 Photo by Michele George Food
Bob and Michelle have a variety of feeders and a variety of food types. It’s no surprise they also have a variety of birds. Some tips from Bob:
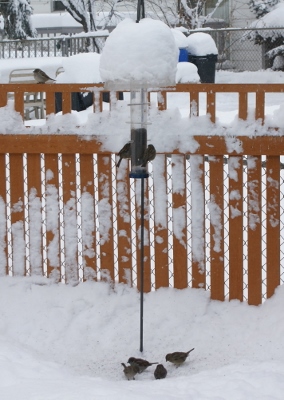 Photo by Michele George - Use a good wild bird food mix from a reputable source. Not the cheap stuff that has useless filler, like milo.
- Some birds like to perch on a hanging feeder. As you can see in the picture above, many are very happy to feast on a flat surface.
- Bob had added sunflower to the buffet, so a cardinal even visited while I was there. Sunflower seeds in a hanging feeder will attract cardinals too.
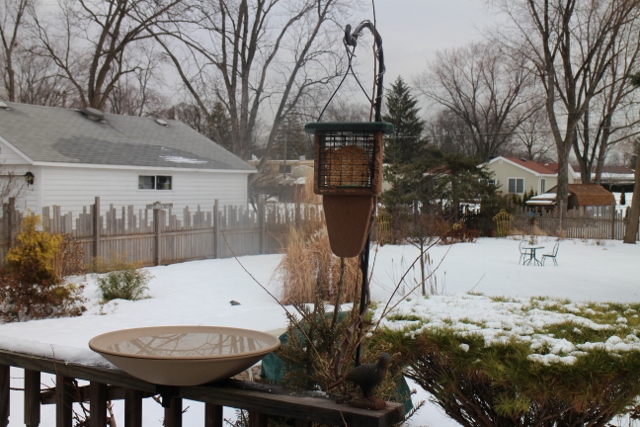
- Have a suet feeder in the winter. Expect woodpeckers.
- Niger for the goldfinch. Fresh niger, as it tends to spoil quickly. Niger should be in a feeder with a roof to keep it from getting wet and moldy. Goldfinch feeders are often tubular and made of wire mesh. The goldfinch hang on without a perch. If the tube has perches, other birds will eat the niger too. Sock type niger feeders tend to be short term as the squirrels will quickly destroy them.
- Bob will throw some peanuts out for the blue jays. He had a wreath style peanut holder that the squirrels always found a way to open.
Water
Bob and Michele had something else I didn’t – water. Our frozen pond is useless for the birds. Even with a heating element to keep an area open, they can’t really get to the water with snow piled around. Duh.
I went home and took action. In my case, take action was putting the info into my ‘Winter Interest’ presentation. That led to Mike seeing the presentation at the Buffalo Grove Garden Club this week. He made a note to go shopping. Next thing you know, Mike has been to Farm and Fleet. He spent $50 and I have a new heated birdbath hanging on my porch rail. See how easy that was.
Shelter
As I sat in the George’s family room, there was constant activity in the nearby arborvitaes. Look closely at the picture. Birds every two feet. This is normal for their yard. Birds here, there, and everywhere. The birds are cared for at the neighbors next door too, so there is a lot of movement.
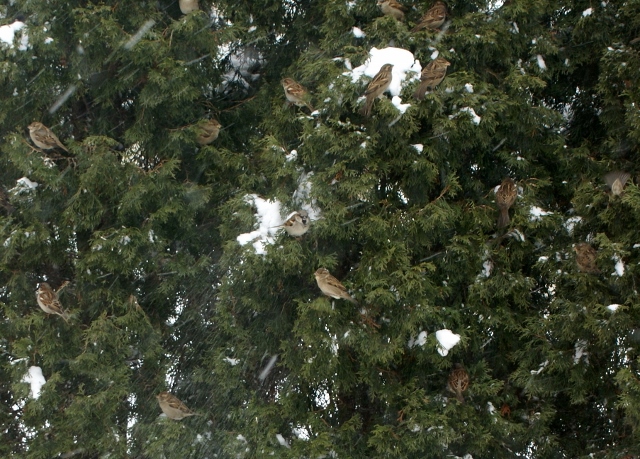 Photo by Michele George Our home was severely lacking in the shelter area. Too much open space near the feeders. Nowhere for the birds to wait in line for a spot at the feeder. Nowhere to feel safe from the occasional hawk. This we knew, so Mike had already brought a few extra Christmas trees home as he canvassed the area on garbage day a week ago.
Food – Water – Shelter
I may not have mentioned this before, but there is a way you can attract flying winter interest to your yard. Try providing Food – Water – Shelter. Then sit back and watch the floor show.
Join me at the Chicago Flower and Garden Show on March 17th, 12:30. I’ll be speaking on Winter Interest.
By Carol Cichorski, on January 15th, 2014 I’ve got color in my yard. Yes, December in Chicagoland and I have color! Granted, none of it is provided by flowers, but I’m not going to let that little detail stop my yard from being colorful. Certainly the snow has been a bit of a detriment to color in the garden. Or has it? Without the snow, this sunrise would not be the same.
Fortunately, I don’t rely on 10 minutes of possible sunrise glory to color my yard. I can’t match God’s work, but I’m not without talents. I did some painting earlier this year, and I leave a lot of my ironwork out. I know it won’t last as long, but I certainly enjoy the bright yellow of these items more now that when they are covered in flowers.

The yellow chair is a rose trellis all summer. Not now. Now I’m viewing my garden from a distance. The yellow looks good and the plants I didn’t cut down add interest too, as long as I don’t look too close to see that they are perhaps a bit past prime.

Likewise, the milk can was a nice background contrast for the bright yellow mums in the fall. It stays out to add winter interest as well.

If leaving your decorations out bothers you, I understand. They won’t last as long. I get it. It’s kind of like my Sugarland sweatshirt. I’m not wearing it because I want it to stay looking nice. It’s not really doing me any good in the closet, still I can’t get myself to have it look less than prime. Fortunately, I don’t feel that way about some of my garden items. I’m enjoying them now and they’ll minimally need a new coat of paint. That’s a good trade-off for me.
Do you want to know what else is blooming (or at least hopefully interesting) in the January garden? To see what other bloggers have blooming on the 15th of every month, visit May Dreams Gardens – Bloom Day for our Garden Bloggers’ Bloom day entries.
Join me at the Chicago Flower and Garden Show on March 17th, 12:30. I’ll be speaking on Winter Interest.
By Carol Cichorski, on January 1st, 2014 
I’ve made winter containers before, and they were nice. However, they were not even in the same league as Patrice’s. Patrice has the creativity gene. I think she also got the creativity genes that were supposed to be allocated to many others. Take the container to the right as a fine example. Well, don’t literally take it, because Patrice would be very sad to find it missing. It would probably take her all of two minutes to make something bigger and better with items she would find in her junk drawer or wastepaper basket, but let’s not put her to the test.
The birch branches are lovely, aren’t they? And she’s drawn your eye to the top with the ceramic bird. Nicely balanced on the bottom she has repeated the red and brought in some green for contrast against the white planter. What I like best about this planter is it is not Christmas themed. This one can stay out for the duration of winter.
Last winter was a bit different at Patrice’s. Actually, I think every day is probably different at her house. Take this bench for instance. Now come on, you should know by now that I don’t mean it. Please don’t take her bench. It was decorated for Valentine’s Day, then for St. Patrick’s and other holidays. I know how Patrice works. Nothing was purchased at full price, or even close. It’s easy to be creative when you can spend money. Patrice does it without. (Reference above: Junk drawer and wastebasket.)

Flowers in bloom haven’t quite left her enclosed porch. Perhaps it’s a bit chilly out there to enjoy them right now. Perhaps not as we do have a few degrees here in Chicagoland and we’re tough.

Speaking of things that haven’t quite left the porch and being tough…I’ve got to go now as its time to water my plants outside.

By Carol Cichorski, on December 11th, 2013 Date and nut cookies are a favorite at our house. You’d expect it to be chocolate chip or gingerbread men, but the unlikely winner is date and nut. I haven’t done much holiday baking yet, but we are already enjoying the delicious date and nut cookies.

1 c salted butter
1 ½ c DARK brown sugar
2 ½ c flour, unsifted
2 c dates (10 oz), cut in pieces
(Freshest if you buy whole
pitted ones and chop them
yourself into kinda small
pieces.)
2 c walnuts, cut in pieces
3 eggs, slightly beaten
1 t baking powder
3 T cinnamon
¼ t salt
1 t honey
1 t pure vanilla extract
1 t pure almond extract
(Parchment paper is optional, but nice.)
Chop the dates, (getting rid of dry ones), also leaving them rather large – about 6 chunks per date.
Mix flour, cinnamon, salt, baking powder.
In large bowl, cream butter, add brown sugar and mix till fluffy. Add beaten eggs one at a time. Add honey, vanilla, almond. (All ok to do in mixer, but do not overmix.)
Add dry ingredients to wet and mix thoroughly.
Add dates and nuts and MIX BY HAND. Still do not overmix!
No liquid is used. Batter should be stiff. Drop from teaspoon onto greased pan (or pan with parchment paper) and leave it in a lump. (See picture for size.) They don’t spread out much at all. (See picture – the ones not on parchment paper are baked.)
325 for 18 minutes, or 300 convection for 14 minutes. They are done when the bottoms just barely start browning. DO NOT OVERBAKE!
Freeze nicely. But don’t wrap them till totally cooled.
Makes 4 dozen
By Carol Cichorski, on November 27th, 2013 We made this healthy appetizer last Thanksgiving and we’ll be doing it again tomorrow. It will look so cute on our host’s table, and give us a healthy appetizer option.

|
|
|