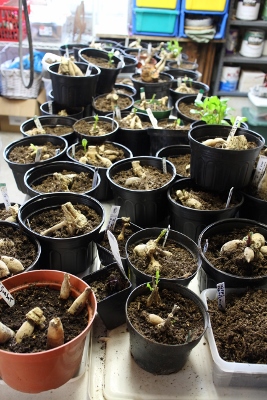
 Mike is up to something. He disappears into the basement for hours at a time. He does that regularly this time of year. He becomes the mad scientist in his laboratory, planning to emerge victorious in May as his 52 pots of dahlias are transformed into 350 dahlia plants. Last year he probably grew 700 plants. I missed him. So though the 700 was my idea, I’ve gotten a little more realistic this year. As always, we’ll keep about 100 for our garden. The rest will go to dahlia sales for the Central States Dahlia Society and the Elk Grove Garden Club.
You may not be looking for 100 dahlias in your yard, like us, but if you’d like more blooms sooner (and who doesn’t?) it’s just about time for you to get started. ‘Starting’ for you would be to first get your hands on a dahlia tuber. Order on-line, go to your local nursery, or even Costco or Home Depot. If Kelvin Floodlight is available, get it.
Don’t wait till there is no more frost so you can plant it outside. Start the tuber inside about 6 weeks before the last frost. A regular fluorescent bulb will provide enough light. A sunny window will probably provide enough light, but the warmth of the sun will dry out the pot quicker than needed, meaning you have to water the pots more often. Fluorescent lights provide good light, but in a cool manner so the pots stay cool and moist longer.
Although dahlias are well known for being fall bloomers, starting early like this will get you blooms from August through frost. You’ll be planting a 1 foot tall plant outside on May 15th, rather than burying a tuber in the ground and not seeing anything above the ground until sometime in June. Clever, huh?
If you’d prefer, you can turn that one tuber into more plants. Basically, you’ll cut the sprouts off to make individual plants and root them. That process would need to begin now, so that there is time for 1 or 2 generations of sprouts to come up.
Here’s how to make more plants:
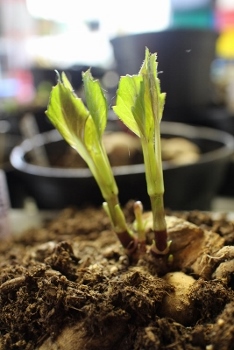
Step 1 – Plant the tuber. Nothing fancy here. You don’t even need light yet. Just a basic pot with basic potting soil and a tuber. As you can see in the picture above, it’s not even fully buried. This allows you good access to sprouts as they emerge.
Step 2 – Keep the soil moist, not wet. Just normal plant care. Sit back and wait. You’ll see sprouts in three weeks or so.
Step 3 – The sprouts will need light. Basically, green things need light, tubers and bulbs don’t until you see some sprouts coming out of them. Use fluorescent lights that are about 3 feet above the sprouts.
Step 4 – When a sprout is about 3″ tall, cut it off about 1/8 inch above the tuber. Don’t worry if you only see one sprout coming out of the tuber. When you cut that one sprout, you’ll typically see anywhere from 3-5 sprouts rise up from that very spot that you took the cutting from. Make a mini terrarium like Frank did below using a Styrofoam cup. Plant the sprout in about 2 inches of plain old pre-soaked kitty litter. Use non-scented, non-clumping, with about 1/8 inch of water in the bottom of the cup. The process even comes with a bonus – You get to go to McDonalds for an ice cream sundae so you have the plastic top for your terrarium cover. You can also use a clear plastic cup as Frank does in the photo, but its not as much fun.
Step 5 – In about 3 weeks, the sprout should have rooted. Carefully extract the cutting from the kitty litter, using a plastic fork to support the root area as you lift. Watch for the roots and be gentle with them. Its ready to transplant into a 4″ pot with dampened (soilless) potting mix in it. Mike allows his freshly potted cuttings to rest for 24 hours before putting them up near the lights again. They have been through a lot having been shuffled around. Let them catch their breath. They’ll thank you for it.
Step 6 – Take care of it like any other baby plant. It does need lots of light, so bring that fluorescent light within inches of the top. Keep the soil moist and perhaps water it with a very very diluted Miracle Grow solution, barely blue in color.
Step 7 – Plan on planting it outside after May 15th, but for now, keep it indoors. More on that later.
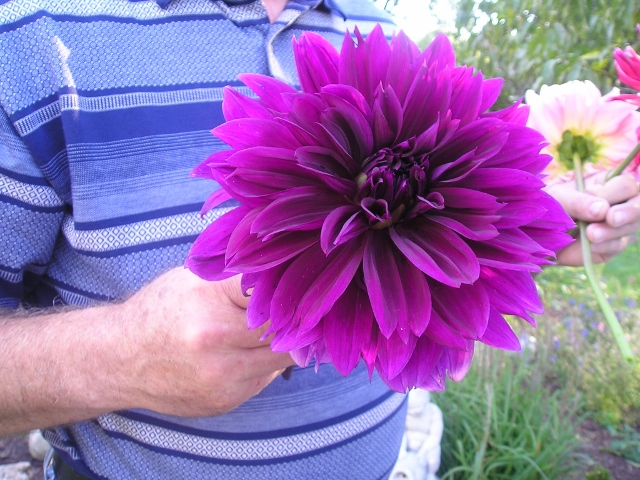
Why do you want to do all of this? Because you’ll get these!

Join me at the Chicago Flower and Garden Show on March 17th, 12:30. I’ll be speaking on Winter Interest.


But… 6 weeks from May 15th is April 1st. We can’t plant things now. I wish I could…
Having a basement helps. We don’t dare plant outside yet either. Mike has enough room and fluorescent lights to get a great head start. We even have a spot in the garage that doesn’t freeze but does stay cold enough to overwinter the tubers.
[…] Give these a few weeks and they will start sprouting. A few more weeks and the sprouts get cut off t… May will arrive (really) and there will likely be 400 ready for our yard, our friend’s yards, and even relative’s yards. […]